Adding a brick edge to your garden bed not only elevates its appearance but also provides a clean division between lawn and flower bed. Follow along as This Old House walks us through a beginner-friendly, cost-effective method using weather-resistant clay bricks. We’ll go over how to:
- Measure your garden bed
- Calculate your materials
- Test-fit the layout
- Cut bricks for curves
- Dig a trench
- Add a 2–3″ layer of paver base
- Mix and add a base layer
- Lay the bricks
- Fill gaps with polymeric sand
Start with Smart Measuring
To determine how many bricks you’ll need, use a rope to trace the garden bed’s perimeter, keeping it snug along the grass. Pull the rope taut and measure its length in inches. Divide by 4 (or the actual width of your brick) and tack on 10% to account for cutting and mistakes.
Edging Curves? No Problem
Lay bricks along the garden edge to preview the layout. For soft curves, fan the bricks slightly. Tight turns require keystone bricks—cut in a wedge shape. Mark the cut lines with a masonry pencil, then use a diamond-blade circular saw to slice cleanly. Trickle water over the cut to minimize dust.
Digging & Prepping the Edging Base
Dig a trench about 6 inches deep, from the grass line to a few inches beyond the brick’s width. You’ll dig until you hit subsoil—this prevents frost heaving. Then, spread a 2–3 inch layer of paver base and tamp it down.
Next, mix six shovels of stone dust with one shovel of Portland cement and moisten the mix slightly. Spread about 1 inch of this blend over the tamped base.
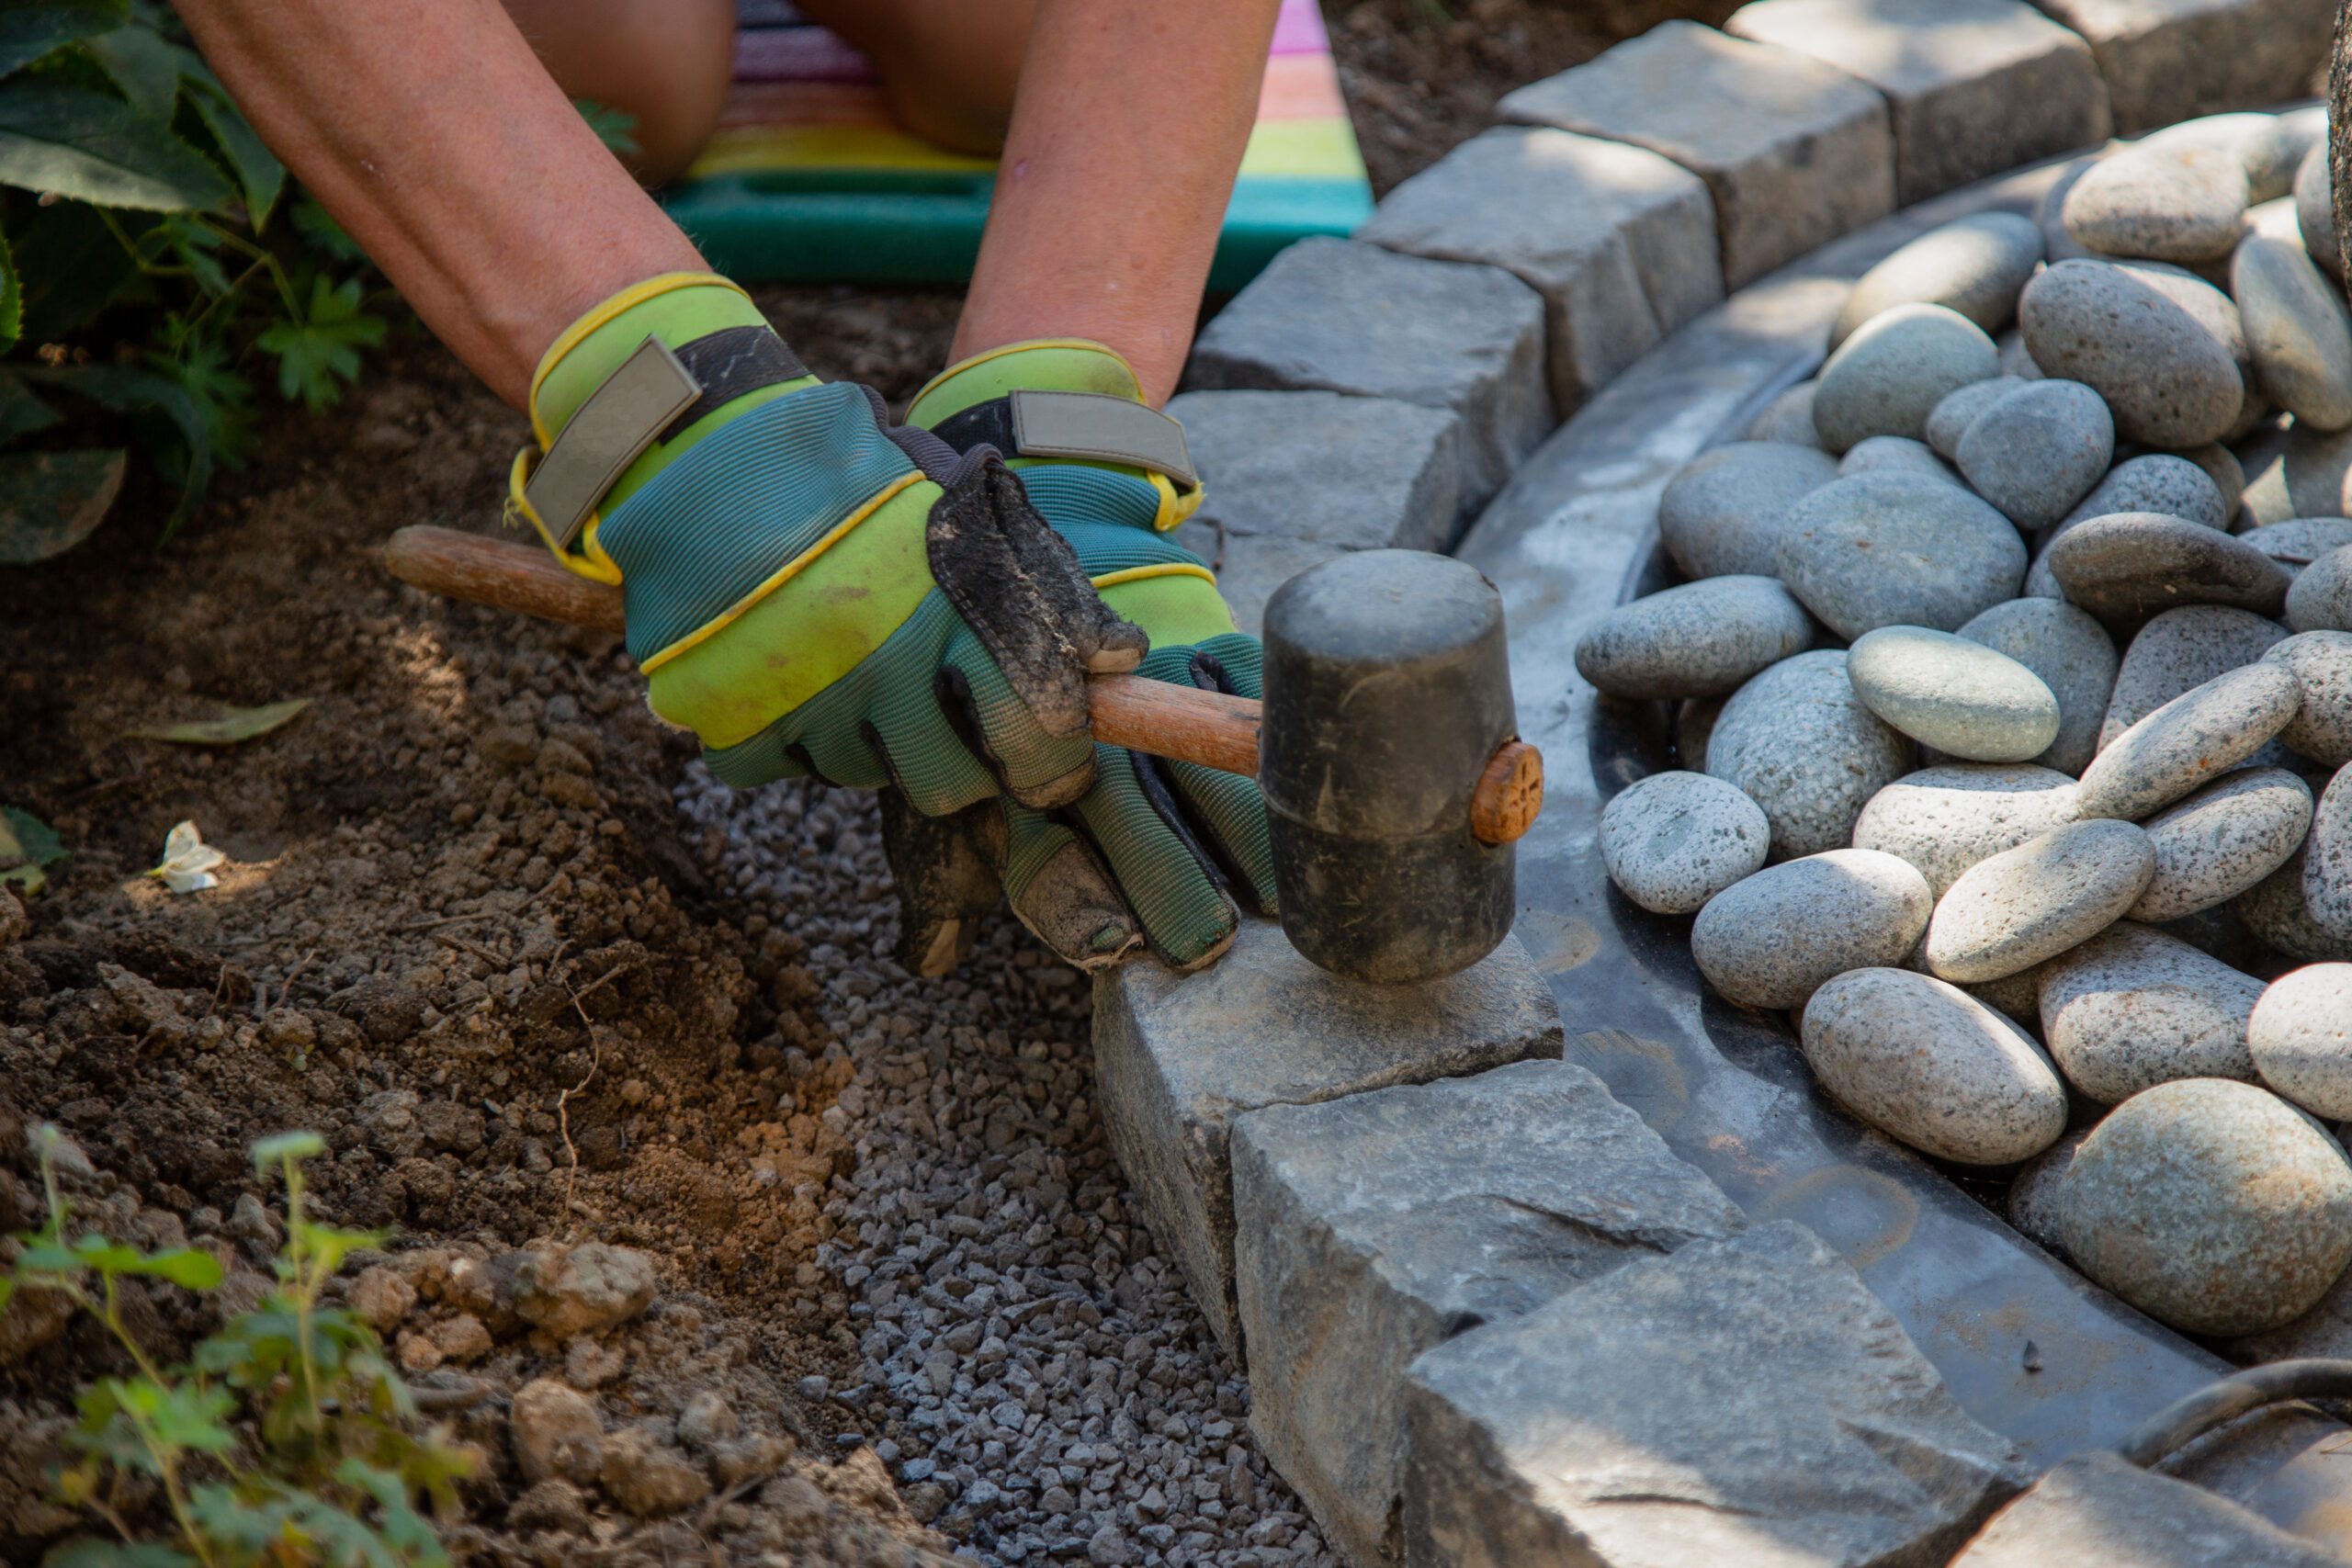
Setting the Bricks
Start laying bricks one by one, pressing them against the bed edge. Tap each into place with a rubber mallet, adjusting the base mix beneath to ensure they sit flush and level with the lawn. Use a 2-foot level frequently to check your work.
Finishing Touches
Once your edge is laid, sweep polymeric sand into the gaps between bricks. Use a paintbrush to work it into joints, tap the bricks again, then mist everything with water. This activates the polymer, locking the bricks in place for years of low-maintenance beauty.
Now your garden bed is not only functional—it’s beautiful too. Just add some plants worthy of your newly finished edge!
For an even more polished look, consider bordering the brick edge with mulch or decorative landscaping stone. This not only prevents weeds but also highlights the brickwork while tying the bed into the rest of the outdoor space. These finishing touches help maintain the integrity of your edge and enhance seasonal curb appeal.
Need Edging Supplies On Long Island?
Astro Masonry has everything you need to edge your garden bed with brick or any other curbstone product. Visit our showroom in Deer Park on Long Island to explore our selection of pavers, base, edging tools, masonry supplies, and more. Whether you’re outlining flower beds or creating crisp lawn borders, we’ve got the materials and know-how to help you get it done right.